Sunday, October 28, 2012

la nourriture


Food visual dictionary for this unit.  
Junk food visual dictionary (print back to back with previous)

Students make their own food bingo cards, 25 photos, only 16 squares, students choose which to use and where they will go so that every card is different.

Power to play unit and curriculum learning outcomes are listed here.  The unit is only available in English but the clear targets for learning are clearly outlined and all of the student materials are available in French as PDFs. 

Example of Power to Play activity.  This photo is a sample, the rest can be downloaded at the Power to Play website. 

Food Poster Print to 11X17, paste or tape together and laminate for a poster.  Or, add velcro to blank poster for an exit activity, review, centre.
Food Guide Snack Tracker.  Print to 11x17.  During snack informally poll students, hold up an fruit from your lunch/snack, dairy product and so on.  A student counts and makes tally marks for the class.  No contest just recording, counting, tally marks.  Students will insist at home that their snack have all the food groups.  Begin this in September to let parents and students know what kind fo snacks are acceptable/healthy choices.

Food collaborative book page, every student draws and completes, bind together for class library.
Accordion book collage (use flyers and magazines) of foods from the 4 food groups and how many servings per day children from 7-9 should have.  See file for all the pages.

Healthy snack choices mini book for "Read to Self" and "Read to Someone".
Vegetable soup book.  A few versions, one requires more student input, another provides more scaffolding for writing simple sentences.  Student may cut and paste vegetables, write from picture provided or draw their own.  Reviews the days of the week.


We made food out of clay and then wrote about what we liked and didn't like in our journals.  Check out the hamburgers and menues we made too.


Journal writing prompts glued into journals for some students.  Gives an up close, at-your-desk example of the sentence structure we are learning.  The words to use for the students own sentence are represented as a picture.  I started doing this for a few students who had a very tough time generating their own writing.  This was a good differentiation for them, rather than a blank page and an example up on a wall or white board.

These were cut up and in a bin for free choice too, some students I glued them in ahead of time, for others they were available if a student wanted.


Pizza Math journal during this unit, November of grade 1.


The very hungry caterpillar books we made during this unit (print to 8.5x14, legal paper)).  Again, you will fond pages that require the students write their own sentences, and some where the stem is provided.  This is a great project.  We did a page a day, lundi, mardi, mercredi.  We made bead caterpillars and then read them to our learning buddies.

Printing and binding instructions are in the document.


Vocabulary cards from the Eric Carle story the Very Hungry Caterpillar found on Sparkle Box.


We had a kitchen centre with food divided into containers depending on the food group, the bowls for each group were labeled.  As an exit game each student draw a food item from our plastic collection.  They tell us something about it in a complete sentence to go for snack, "C'est un orange, je n'aime pas les oranges.  Voici une banane, c'est jaune."


As part of this unit your school may also choose to participate in Club Moo, especially if you have a school milk program.  See the details at the Club Moo website.
MORE RESOURCES AND IDEAS ON MY FOOD PINTEREST BOARD!

Songs we love:

Tuesday, October 9, 2012

centres in kindergarten

This post is for a fellow teacher, not all of the links are complete.  It will be an official post soon but I want to share the materials with her right away . . . kind of in draft, sorry!

Ashley,

I had a tough time finding a good photo of the centres chart I used.  This one you can kind of see.  Morning names down one side, afternoon down the other.  The centres are down the middle.

Here are the centre cards I used.  I think I used the smaller ones as the big ones took up too much room in the pocket chart.  I permanently glued and laminated #s onto coloured cards leaving room to sticky tack the centre cards on, that way they can change, be re-used.


There are a whole bunch, changed them depending on the centres we had in the room.  Enlarged these to put near corresponding centre or on the bin, tray their materials were on so students knew where to go.

This is the centre wheel Jackie used.


I also have an outline I started of all of the centres for the year by theme and activity, will find and post here.

Leadership job chart, this is easy to change, all of the names and images slide out.


These classroom leader cards need to be printed to photo sized cards 4x6,  I know that's a pain, I'll try to repost it onto 8.5x11.  They fit perfectly into the CD cover envelopes and the picture shows through the window.


John and I both used this self tracking sheet.  Students coloured the centre as they completed it.  They also tracked their partners.  Kind of like the beginning of self-evaluation and self-directed learning.

It was a lot of work BUT I am glad to have it now to know what centres we did, I think you will find up to February.  I also used this to jot down the partners, often students and parents complained their child was never/always with so-an-so this way I had a record.

Some of these I wouldn't do now, I have evolved!  This is still handy for reference.
Things I would change, I would have photos of students on their name cards for sure in K, if the centre image doesn't also have the name I would add it (je peins, je bricole  . . . ).


Calendar should really be an entire year calendar shown at once, more authentic.  Here's a great blog post about how to do that and why.

This is grade 1.


For grade 1 the order or schedule was by time, for K the cards were just in a row and they turned them over when done.  Will post those cards too!


This is k calendar set up.  Rather than have everyone sit through the whole process all year once they are independent it would be a centre for students to set up and do with a partner.


les couleurs

We begin with the Alberta learning outcomes written in clear student friendly "I can" statements.  Students, parents and teachers can track and document learning throughout the unit.


The colour unit visual dictionary includes "foncé" and "pâle".  Even before we learn those terms students may use them in their journals.  One of the sentence structures we learn early on is "Voici + a noun, c'est + a colour".


Colour unit word strips.


Begin by giving students trays and pipettes and ask, how many different colours can you make from red, blue and yellow?  You don't need the cool Steve Spangler trays, you can use ice cube trays.  Pipettes, food colouring, and an open-ended question - what could be more fun?

The link will give you more details on how to proceed.


Let your grade 1 students paint the first week of school.  Get the paint pallets above for a dollar from the dollar store and quit being scared of paint.

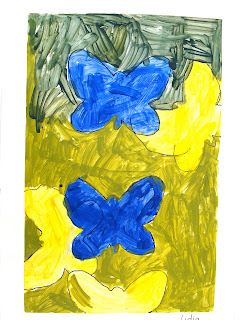
This book is fun, self-explanatory.  Grab a visual dictionary, pick a colour, paint and print.  Don't make them colour.  We don't colour stuff.  This is about teaching the routine of using paints and learning the colours.  PAINT!


Hey look, a crayon colour mini book for our book boxes that grade 1 students can read.


Make this colour texture book.  Find things in the classroom and the playground to use for each colour.  

Red:  pompoms
Orange:  Orange PEZ candy wrappers
Yellow:  feather
Green:  yarn
Blue:  sequins
Purple:  ribbon
Gray:  tin foil
Brown:  bark mulch
Black:  rubber crumb

Use toothpicks, teach DABS of glue, not GOBS.  There, you've taught a painting and a gluing routine and it's only September.

Students who are able can write their own sentences, make their own book from blank pages or add pages and colours.


Don't have them colour the cover like I did, let them use PAINT!  Pop out only the primary colour pucks and have them mix on a plastic lid to get the other colours.  It will be messy.  The pucks can be rinsed off (this is the cover of the texture book).  Oh look, another I can read for for our book boxes.


1.  By large paper on sale at Michaels' really big and maybe cut it.  These were .40 each, not easy to find.

2.  Tape the sides to your art boards with painters tape (have a parent volunteer do this for you).  Gail at www.thatartistwoman.org will explain how to make art boards.

3.  Trace with pencil those card boards shapes you can find at Michael's, keep it simple.

4.  Demonstrate how to overlap and then erase the lines behind (this is tough for gr. 1, go around and model).


5.  Talk about having things face different directions, go off the edge, overlap (oh look, elements and principles of design!!).

6.  Trace with Sharpies (I know, sharpies, in grade 1, cray-zay).

7.  Give each pair pf students 2 primary colours.  They paint INSIDE their designs with both colours.  Only once BOTH are finished they mix up their paint and paint the back ground the resulting SECONDARY colour.


8.  Once dry peel back the tape, check out that beautiful crisp white border.  Post them in the library.  Gorgeous.  Make sure you plaster the wall with the science outcome:  We mixed primary colours to make secondary colours.


Read some of these books.  They're simple, easy to understand for K and 1 French Immersion.  There may be some animations on YouTube or Vimeo.  Check my Pinterest board for updates.

Read this one.  Then make your own Mouse Paint Book.  Watch and listen to the animation on YouTube.

Template for your own Mouse Paint Book. (note there has been a correction made to this file, the book should read "la souris" not "le" as in the following photo)

Learn about the difference between manufactured and natural materials (these are Alberta outcomes) with a manufactured and natural colour book.  I use the Edmonton Public Science resources.  They are available in both French and English and have great hands on science lessons.  I won't post it all here.  There is a simple version and one with longer sentences
For this booklet we covered the natural item with tissue and the manufactured is coloured.  It was also a review of the school vocabulary we learned early in September.


A fall book of colours, focusing on spelling, letter formation (les giraffes, les coccinelles, les singes).

Read Petit Bleu and Petit Jaune.  I love this sweet story.  Give students pieces of playdough in primary colours, let them smush them together to make secondary colours.  Here's the story and video animation on Vimeo.

Let students choose a paint chip.  Have them practice making tints (add white) and shades (add black) of a colour.  The goal is to match your paint chip.  Encourage students to use the guess and check strategy, just like in problem solving in math.


This document has some other experiments and activities we did.  Some are worksheet-ish.  They were accompanied by experiments,  sometimes we put the learning on paper, other times we didn't.  Click to download and have a look.  We  dyed cotton using beets, split the stems of celery and carnations and left in food colouring etc.  We also experimented with the concept of transparent and opaque colours.

Our collaborative class book this month was based on a book in the library and now I can't remember what it was . . . here is the format (there is a page for every colour).  Each student completes a page, we bind them together and add them to the class library.

Our kindergarten colour class book was simpler, we coloured and painted balloons and glued on a string.  Bound and in the class library it's a favourite in September.  I add a photo of each student as we get to know each other and learn names.

This was an ice cream cone colour project we made in Kindergarten, maybe too young for grade 1.  They could make their own labels?

To find more great stuff, links, videos, books for this unit go to my Pinterest Board.  If you're not on Pinterest and need an invite e-mail me and I will make it happen.  shannonwiebe@hotmail.com